
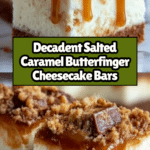
Decadent Salted Caramel Butterfinger Cheesecake Bars Recipe
Introduction
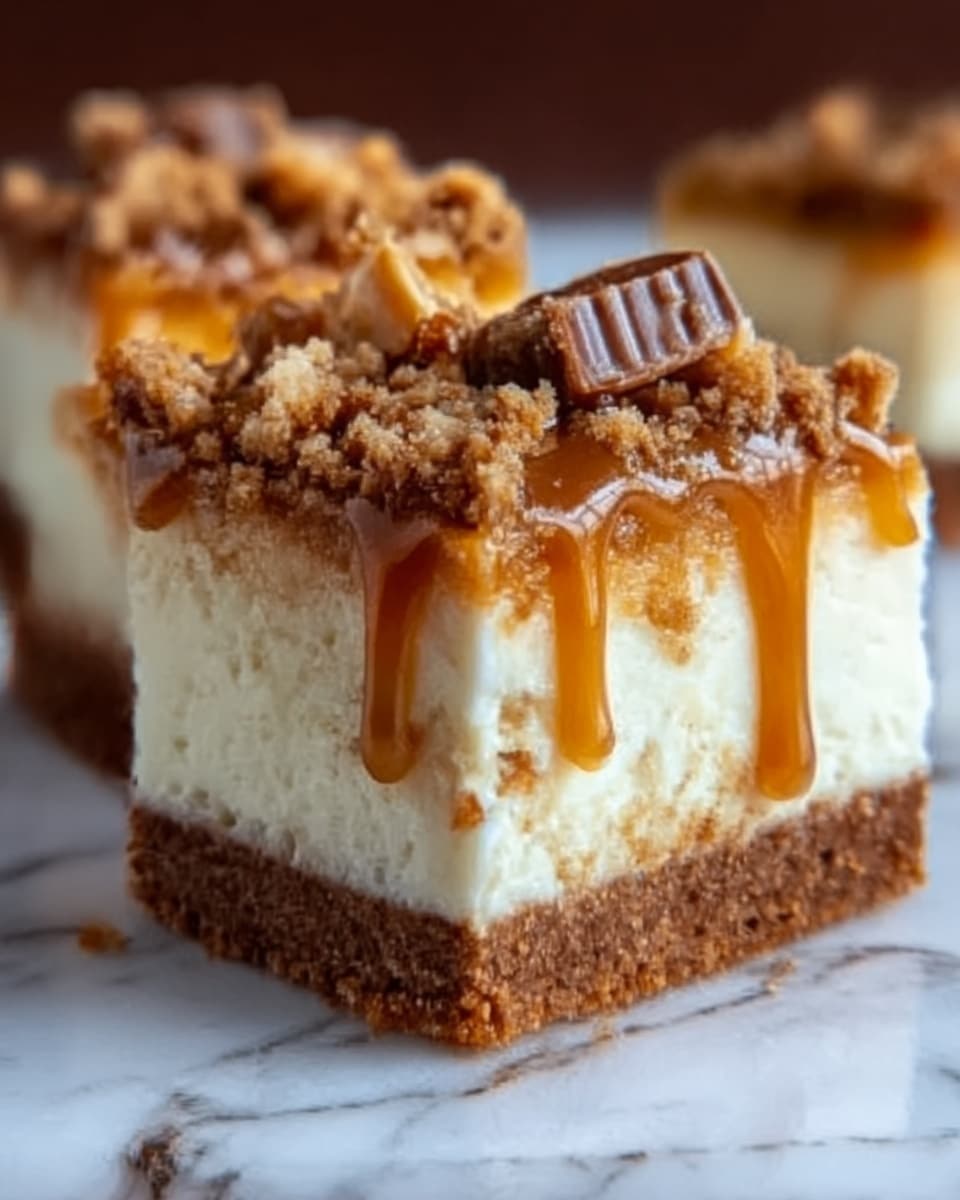
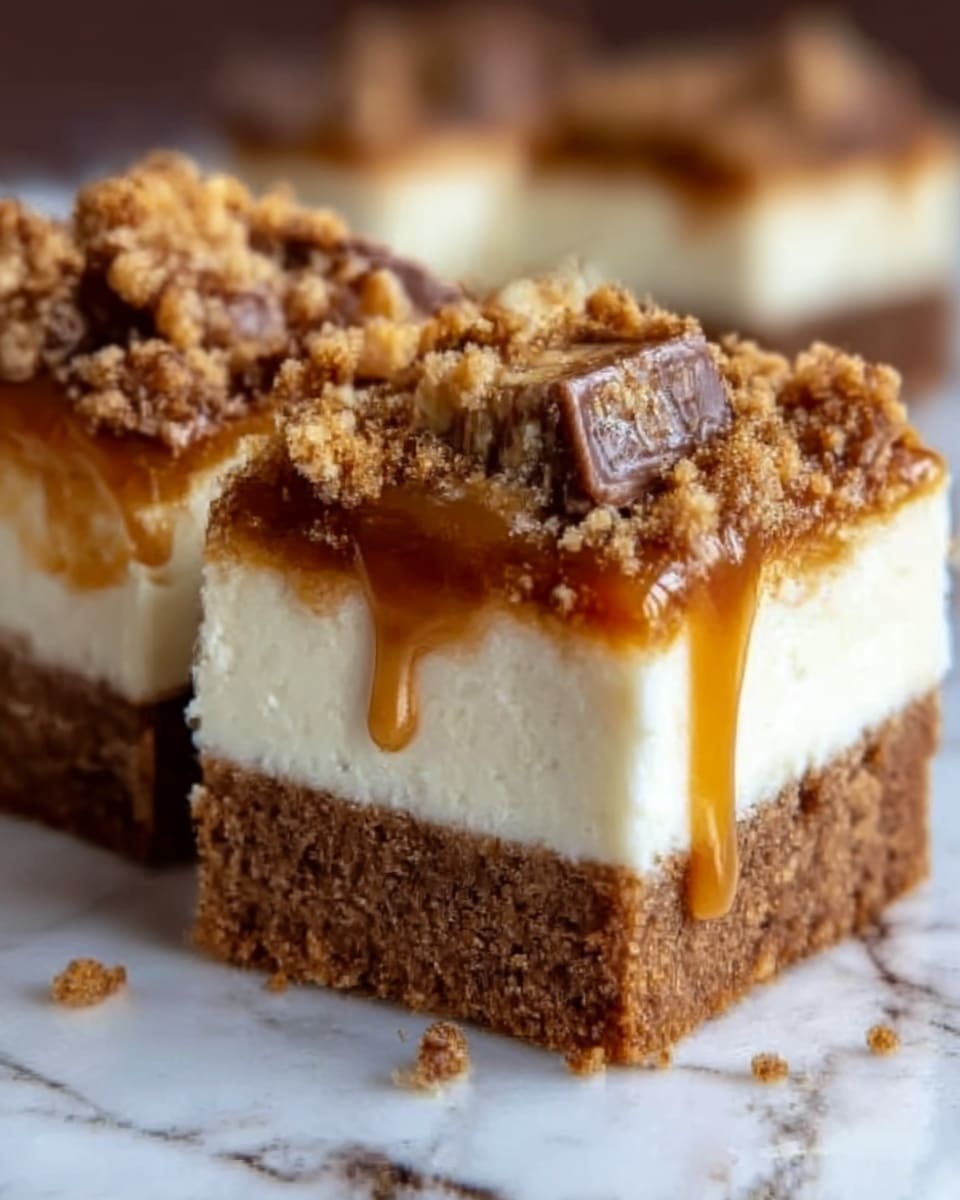
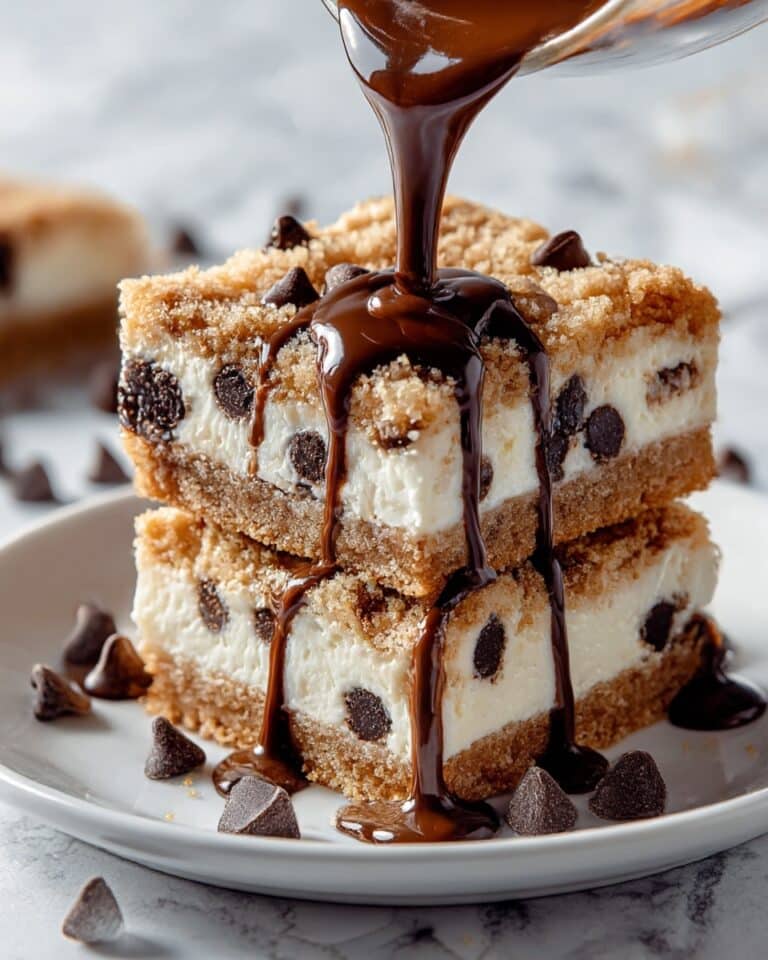
These Decadent Salted Caramel Butterfinger Cheesecake Bars combine a creamy cheesecake filling with a crunchy Butterfinger candy topping and a buttery graham cracker crust. The salted caramel drizzled on top adds an irresistible sweet and salty finish, making these bars a perfect treat for any occasion.
Ingredients
- 1 ½ cups graham cracker crumbs (about 10 full sheets, finely crushed)
- 6 tablespoons unsalted butter, melted
- ¼ cup granulated sugar
- 16 ounces cream cheese, softened
- ⅔ cup granulated sugar
- 2 large eggs, room temperature
- 1 teaspoon pure vanilla extract
- ½ cup sour cream
- 2 Butterfinger candy bars, crushed (about 3.5 ounces)
- ½ cup salted caramel sauce
Instructions
- Step 1: Preheat your oven to 325°F (163°C). Line an 8×8-inch pan with parchment paper, leaving some overhang for easy bar removal.
- Step 2: In a medium bowl, combine graham cracker crumbs, melted butter, and ¼ cup sugar. Stir until evenly mixed and press firmly into the bottom of the prepared pan.
- Step 3: Bake the crust for 10 minutes. Remove from oven and let cool slightly.
- Step 4: In a large bowl, beat softened cream cheese with ⅔ cup sugar on medium speed until smooth and creamy.
- Step 5: Add eggs one at a time, mixing well after each addition. Stir in vanilla extract and sour cream until just combined.
- Step 6: Pour the filling over the cooled crust and spread evenly. Tap the pan gently to release air bubbles.
- Step 7: Bake for 35-40 minutes, until edges are set but center jiggles slightly.
- Step 8: Remove from oven and let cool for 10 minutes. Drizzle salted caramel sauce evenly over the top.
- Step 9: Sprinkle crushed Butterfinger pieces evenly over the caramel and press gently to stick.
- Step 10: Refrigerate for at least 3 hours or overnight to firm up.
- Step 11: Lift bars out using parchment overhang and cut into 9 squares.
Tips & Variations
- For extra crunch, toast the graham cracker crumbs lightly before mixing with butter.
- Use different candy bars like Heath or Snickers for a new twist on the topping.
- If you prefer a stronger caramel flavor, swirl some salted caramel into the filling before baking.
Storage
Store these cheesecake bars in an airtight container in the refrigerator for up to 4 days. Reheat slightly in the microwave if desired, but they are best enjoyed chilled. You can also freeze the bars for up to 1 month; thaw in the refrigerator before serving.
How to Serve
Serve this delicious recipe with your favorite sides.
FAQs
Can I make these bars ahead of time?
Yes, these cheesecake bars can be made a day in advance and refrigerated overnight to allow the flavors to meld and the texture to firm up nicely.
What if I don’t have salted caramel sauce?
You can substitute with regular caramel sauce and sprinkle a small pinch of flaky sea salt on top to mimic the salted caramel flavor.
Print
Decadent Salted Caramel Butterfinger Cheesecake Bars Recipe
- Total Time: 3 hours 5 minutes
- Yield: 9 bars 1x
Description
Decadent Salted Caramel Butterfinger Cheesecake Bars are a luscious dessert featuring a buttery graham cracker crust topped with a smooth, creamy cheesecake layer. This cheesecake is infused with vanilla, swirled with a rich salted caramel sauce, and sprinkled generously with crunchy crushed Butterfinger candy bars for an irresistible combination of flavors and textures. Perfectly baked until just set and chilled to firm, these bars offer a perfect balance of sweet, salty, and crunchy elements in every bite.
Ingredients
Crust
- 1 ½ cups graham cracker crumbs (about 10 full sheets, finely crushed)
- 6 tablespoons unsalted butter, melted
- ¼ cup granulated sugar
Cheesecake Filling
- 16 ounces cream cheese, softened
- ⅔ cup granulated sugar
- 2 large eggs, room temperature
- 1 teaspoon pure vanilla extract
- ½ cup sour cream
Topping
- 2 Butterfinger candy bars, crushed (about 3.5 ounces)
- ½ cup salted caramel sauce
Instructions
- Preheat and Prepare Pan: Preheat your oven to 325°F (163°C). Line an 8×8-inch pan with parchment paper, leaving an overhang on the sides for easy removal of the bars.
- Make the Crust: In a medium bowl, combine graham cracker crumbs, melted butter, and ¼ cup granulated sugar. Stir until the mixture is evenly combined and press it firmly into the bottom of the prepared pan to form an even crust layer.
- Bake the Crust: Bake the crust in the preheated oven for 10 minutes. Remove it and allow it to cool slightly while preparing the filling.
- Beat the Cream Cheese: In a large bowl, beat the softened cream cheese with ⅔ cup sugar on medium speed until the mixture is smooth and creamy without any lumps.
- Add Eggs and Flavorings: Add eggs one at a time to the cream cheese mixture, beating well after each addition. Stir in the vanilla extract and sour cream until just combined, being careful not to overmix.
- Pour and Smooth Filling: Pour the cream cheese filling over the slightly cooled crust and spread it evenly. Gently tap the pan on the counter a few times to release any trapped air bubbles.
- Bake the Cheesecake Bars: Bake for 35 to 40 minutes, until the edges are set but the center still jiggles slightly when nudged.
- Cool and Add Toppings: Remove from the oven and let cool for 10 minutes. Drizzle the salted caramel sauce evenly over the top of the cheesecake layer.
- Add Candy Bar Topping: Sprinkle the crushed Butterfinger pieces evenly over the caramel and gently press them down so they stick to the sauce.
- Chill to Set: Refrigerate the bars for at least 3 hours or overnight to allow the cheesecake to firm up fully.
- Slice and Serve: Lift the bars out of the pan using the parchment paper overhang and cut into 9 equal squares. Serve chilled and enjoy!
Notes
- Ensure cream cheese is softened to room temperature for a smooth batter without lumps.
- Do not overbake the cheesecake; it should still jiggle slightly in the center to prevent cracking and maintain creaminess.
- Use parchment paper with an overhang for easy removal of bars.
- Feel free to substitute salted caramel sauce with homemade caramel or your favorite store-bought version.
- For extra crunch, add additional crushed Butterfinger pieces on top just before serving.
- Prep Time: 15 minutes
- Cook Time: 50 minutes
- Category: Dessert
- Method: Baking
- Cuisine: American
Keywords: Salted Caramel Cheesecake Bars, Butterfinger Cheesecake, Dessert Bars, Cream Cheese Dessert, Easy Cheesecake Bars