
White Chocolate Raspberry Dream Cake Recipe
Introduction
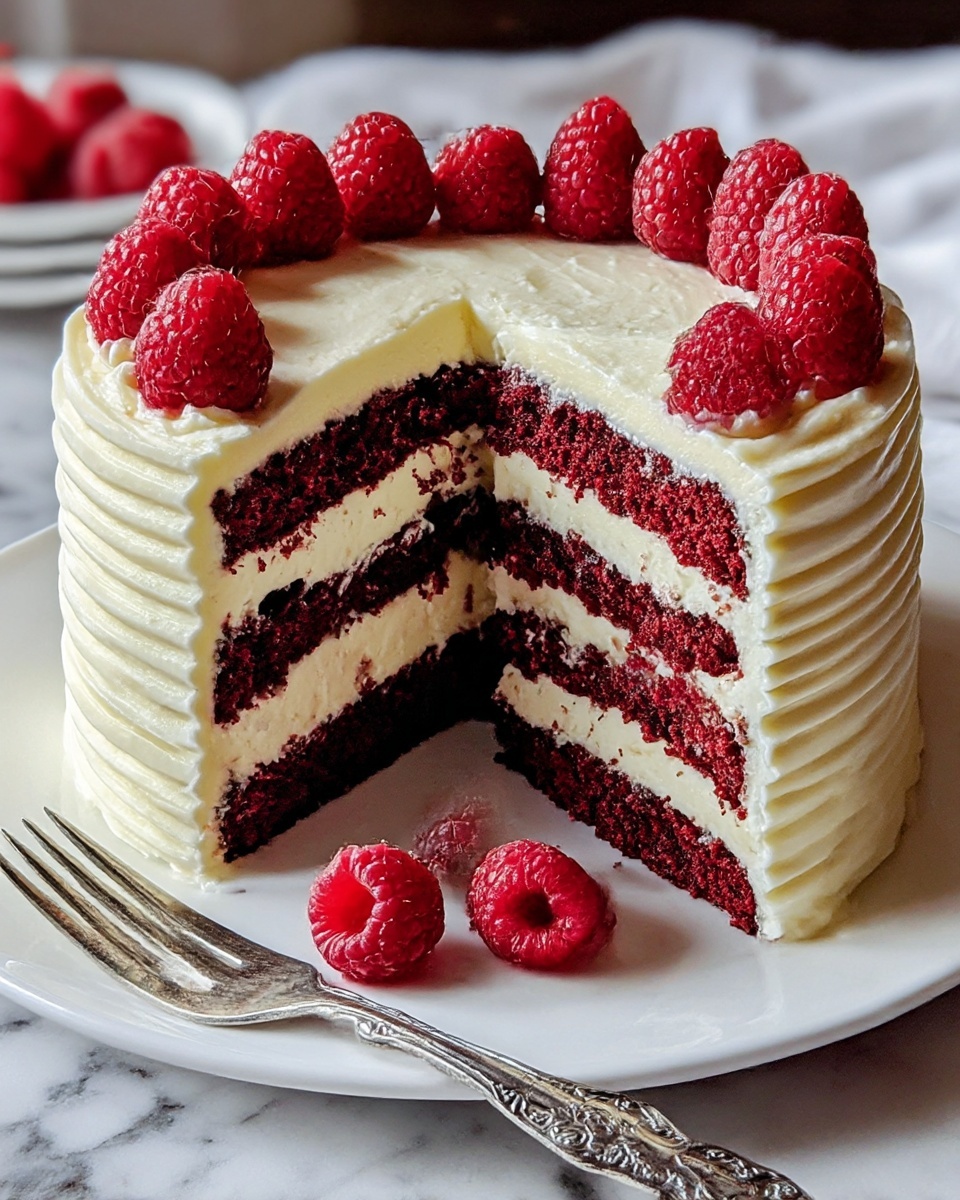
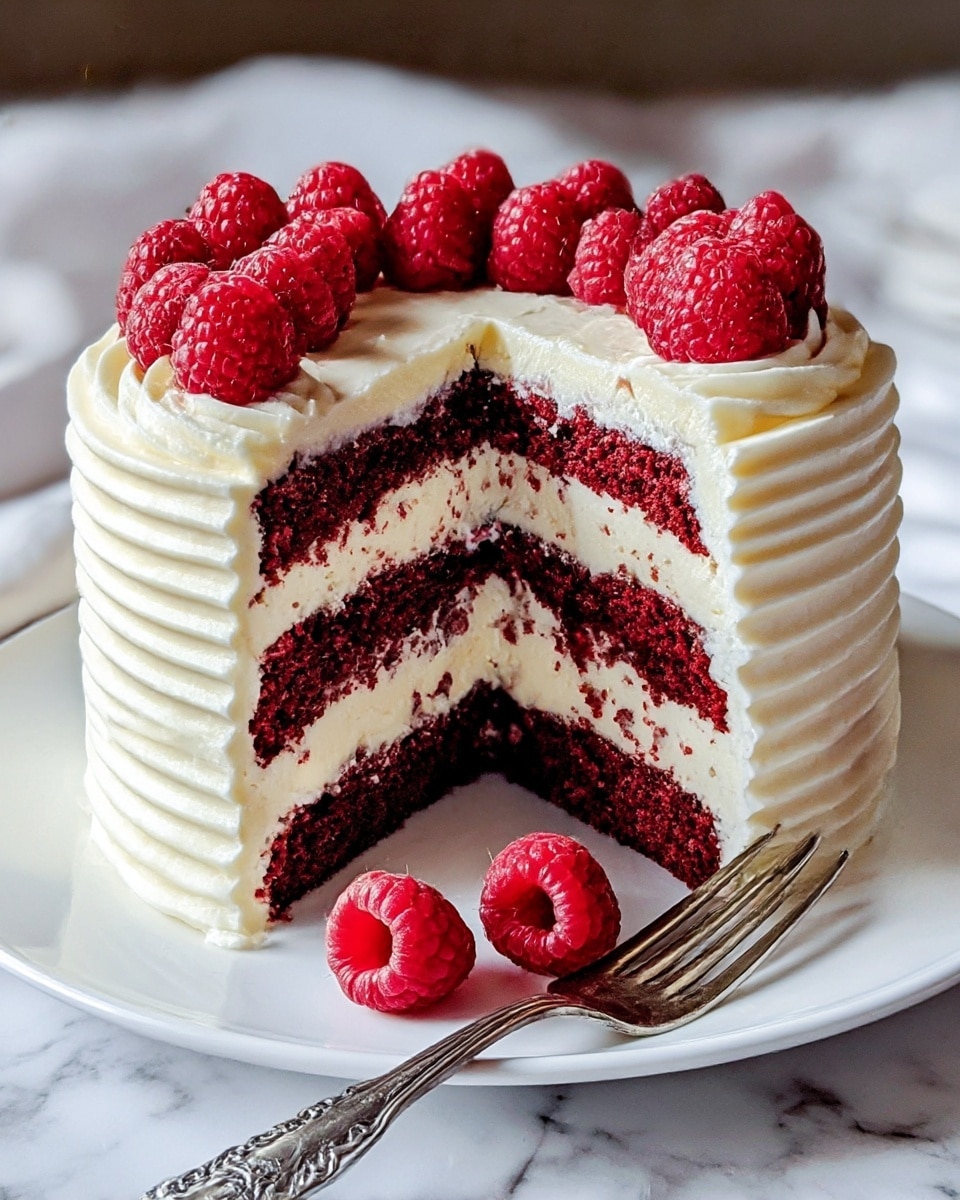
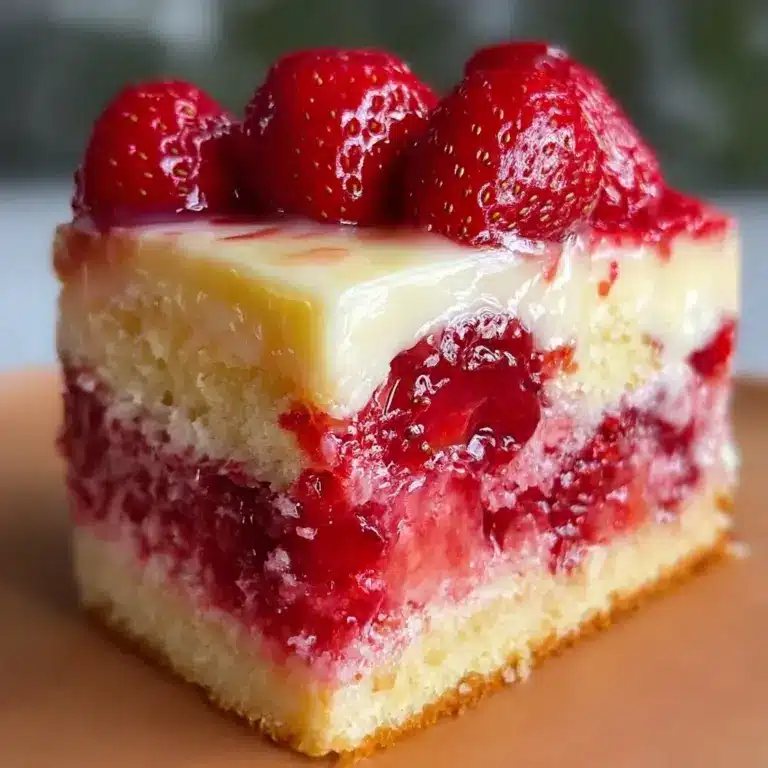
This White Chocolate Raspberry Dream Cake is a delightful combination of rich white chocolate and fresh raspberries layered in a moist, fluffy cake. Perfect for special occasions or whenever you crave a fruity, creamy dessert that feels both elegant and homemade.
Ingredients
- 2 cups all-purpose flour
- 1 ½ cups granulated sugar
- ½ cup unsalted butter, softened
- 1 cup milk
- 3 large eggs
- 1 tablespoon baking powder
- 1 teaspoon vanilla extract
- ½ teaspoon salt
- 1 cup white chocolate chips
- 1 cup fresh raspberries
- 1 cup heavy whipping cream
- 2 tablespoons powdered sugar
- 1 teaspoon vanilla extract (for whipped cream)
Instructions
- Step 1: Preheat your oven to 350°F (175°C). Grease and flour two 9-inch round cake pans.
- Step 2: In a large mixing bowl, cream together the softened butter and granulated sugar until light and fluffy.
- Step 3: Add the eggs one at a time, mixing well after each addition. Stir in the vanilla extract.
- Step 4: In a separate bowl, whisk together the flour, baking powder, and salt. Gradually add this dry mixture to the wet ingredients, alternating with the milk. Mix until just combined.
- Step 5: Gently fold in the white chocolate chips and fresh raspberries.
- Step 6: Divide the batter evenly between the prepared cake pans. Bake for 25-30 minutes, or until a toothpick inserted in the center comes out clean.
- Step 7: Allow the cakes to cool in the pans for 10 minutes before transferring them to a wire rack to cool completely.
- Step 8: While the cakes are cooling, prepare the whipped cream by beating the heavy whipping cream, powdered sugar, and vanilla extract in a mixing bowl until soft peaks form.
- Step 9: Once the cakes are completely cool, place one layer on a serving plate. Spread a layer of whipped cream on top, then place the second layer on top.
- Step 10: Frost the top and sides of the cake with the remaining whipped cream. Garnish with additional raspberries and white chocolate shavings if desired.
Tips & Variations
- For a richer flavor, try adding a tablespoon of raspberry puree between the layers.
- You can substitute raspberries with strawberries or blueberries for a different berry twist.
- Make sure not to overmix the batter once the dry ingredients are added to keep the cake light and fluffy.
Storage
Store the cake in an airtight container in the refrigerator for up to 3 days. To reheat, allow the cake to come to room temperature before serving. The whipped cream frosting is best enjoyed fresh and may soften if left out too long.
How to Serve
Serve this delicious recipe with your favorite sides.
FAQs
Can I use frozen raspberries instead of fresh?
Yes, you can use frozen raspberries, but make sure to thaw and drain them well to prevent excess moisture from affecting the cake texture.
How do I prevent the white chocolate chips from sinking to the bottom?
Coat the white chocolate chips lightly with flour before folding them into the batter. This helps keep them suspended evenly throughout the cake.
Print
White Chocolate Raspberry Dream Cake Recipe
- Total Time: 1 hour
- Yield: 12 servings 1x
Description
This White Chocolate Raspberry Dream Cake is a luscious, moist layered cake bursting with fresh raspberries and creamy white chocolate. It features tender vanilla cake layers studded with white chocolate chips and raspberries, frosted with fluffy homemade whipped cream. Perfect for celebrations or any special occasion, this cake combines fruity freshness with rich sweetness for a delightful dessert experience.
Ingredients
Cake Ingredients
- 2 cups all-purpose flour
- 1 ½ cups granulated sugar
- ½ cup unsalted butter, softened
- 1 cup milk
- 3 large eggs
- 1 tablespoon baking powder
- 1 teaspoon vanilla extract
- ½ teaspoon salt
- 1 cup white chocolate chips
- 1 cup fresh raspberries
Whipped Cream Frosting
- 1 cup heavy whipping cream
- 2 tablespoons powdered sugar
- 1 teaspoon vanilla extract
Instructions
- Preheat Oven and Prepare Pans: Preheat your oven to 350°F (175°C). Grease and flour two 9-inch round cake pans to prevent sticking and ensure even baking.
- Cream Butter and Sugar: In a large mixing bowl, use a mixer to cream together the softened butter and granulated sugar until the mixture is light and fluffy, which helps incorporate air for a tender cake.
- Add Eggs and Vanilla: Add the eggs one at a time into the creamed butter and sugar, mixing well after each addition to ensure full incorporation. Stir in the vanilla extract for flavor.
- Combine Dry Ingredients: In a separate bowl, whisk together the all-purpose flour, baking powder, and salt to ensure they are evenly distributed.
- Mix Wet and Dry Ingredients: Gradually add the dry flour mixture to the wet ingredients alternately with the milk, beginning and ending with the flour mixture. Mix until just combined to prevent overmixing and a tough cake.
- Fold in Raspberries and White Chocolate Chips: Gently fold the fresh raspberries and white chocolate chips into the batter so they are evenly distributed without breaking the berries.
- Divide Batter and Bake: Divide the batter evenly between the prepared cake pans. Bake in the preheated oven for 25-30 minutes or until a toothpick inserted into the center comes out clean.
- Cool Cakes: Allow the cakes to cool in the pans for 10 minutes to firm up, then transfer them to a wire rack to cool completely. Cooling prevents the cake from crumbling when assembling.
- Prepare Whipped Cream: While the cakes cool, beat the heavy whipping cream with powdered sugar and vanilla extract in a mixing bowl until soft peaks form. This will be used as frosting.
- Assemble Cake: Place one cooled cake layer on a serving plate, spread a layer of whipped cream over the top, then place the second cake layer on top.
- Frost and Garnish: Use the remaining whipped cream to frost the top and sides of the entire cake. Garnish with additional fresh raspberries and white chocolate shavings if desired for an elegant finish.
Notes
- For richer raspberry flavor, add a tablespoon of raspberry puree between the cake layers before frosting.
- You can substitute the fresh raspberries with strawberries if preferred or unavailable.
- Ensure whipped cream is whipped to soft peaks to prevent it from turning grainy when spreading.
- Use room temperature ingredients to ensure even batter mixing and better cake texture.
- Prep Time: 20 minutes
- Cook Time: 30 minutes
- Category: Dessert
- Method: Baking
- Cuisine: American
Keywords: white chocolate raspberry cake, layered cake, cream frosting, homemade dessert, raspberry cake recipe


