
Strawberry Crunch Cheesecake Tacos Recipe
Introduction
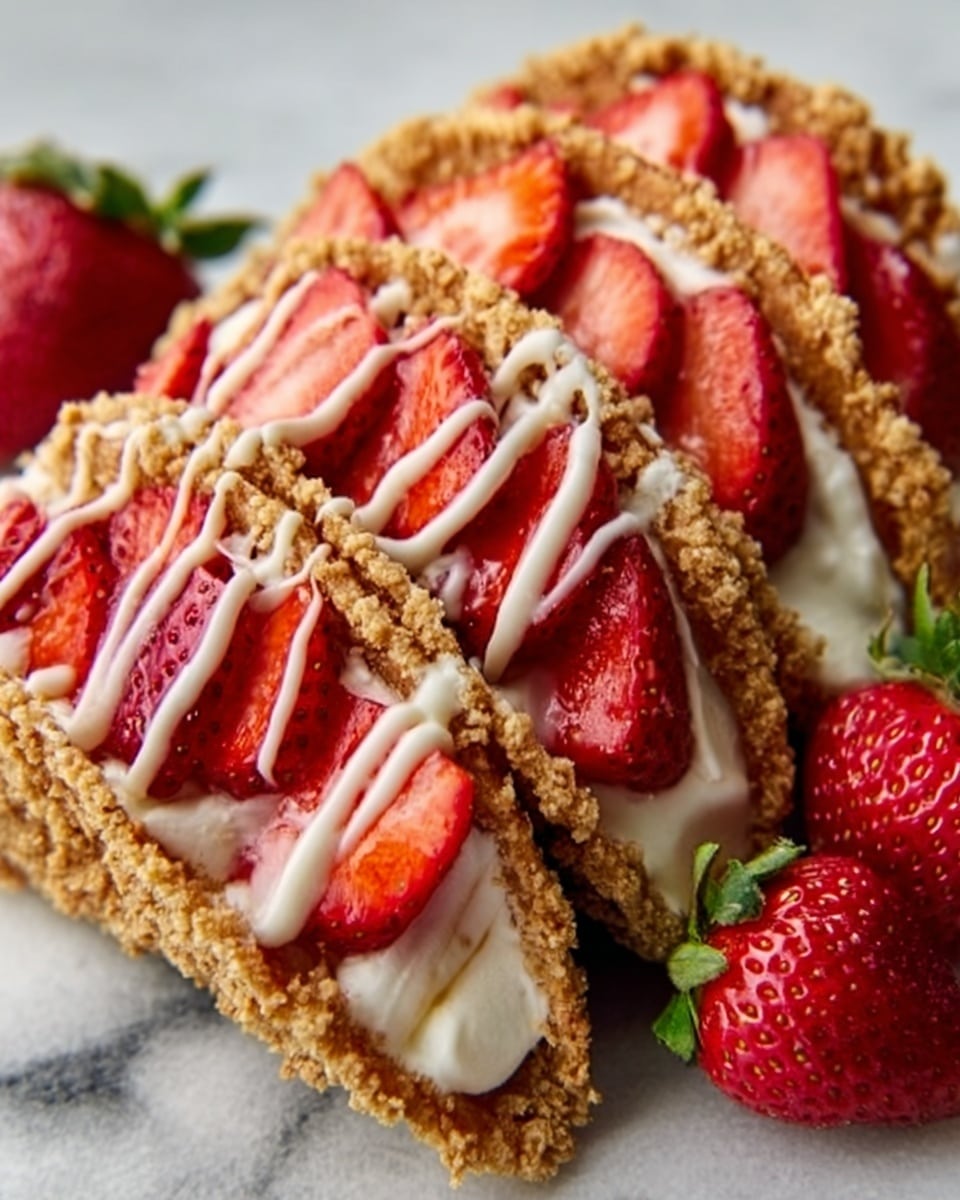
Strawberry crunch cheesecake tacos are a delightful modern dessert that turns classic cheesecake into a fun, portable treat. Combining a crispy shell, creamy no-bake cheesecake filling, and a signature strawberry crunch topping, this recipe is perfect for quick indulgence without baking.
Ingredients
- 1 waffle cone or taco-shaped cookie shell
- 2 oz cream cheese, softened
- 1 tablespoon powdered sugar
- 2 tablespoons whipped topping
- 6-8 Golden Oreos
- 2 tablespoons freeze-dried strawberries
- 1 tablespoon butter, melted
- Optional toppings: fresh strawberry slices, white chocolate drizzle, extra freeze-dried strawberry pieces
Instructions
- Step 1: Prepare the crunch topping by crushing 6-8 Golden Oreos into coarse crumbs. Add 2 tablespoons of crushed freeze-dried strawberries and mix with 1 tablespoon melted butter until the mixture sticks together when pressed.
- Step 2: Beat 2 ounces of softened cream cheese with 1 tablespoon powdered sugar until smooth and fluffy. Gently fold in 2 tablespoons whipped topping until creamy and thick.
- Step 3: Choose your shell, such as a waffle cone or a taco-shaped cookie shell. Spoon or pipe the cheesecake filling into the shell evenly.
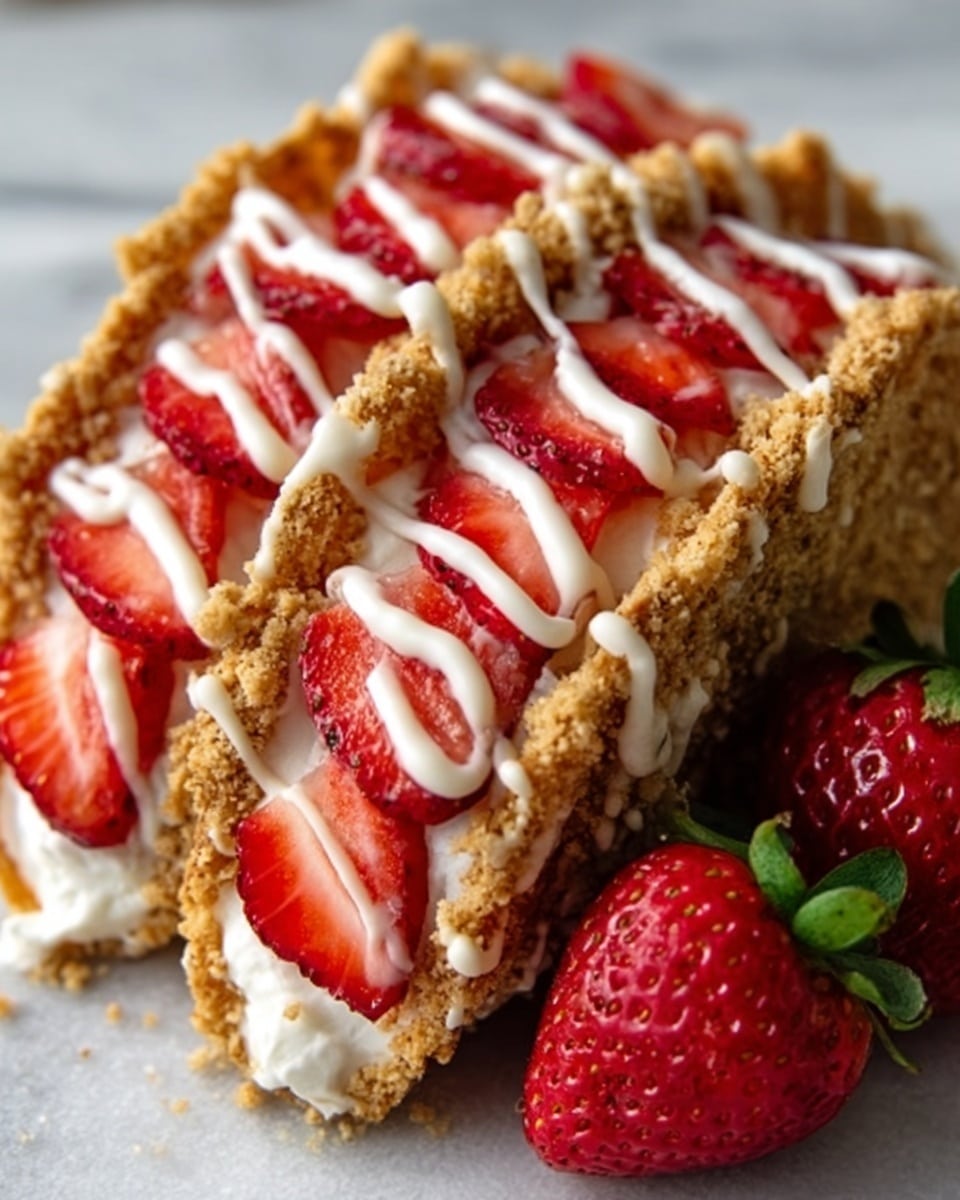
- Step 4: Press the strawberry crunch mixture generously over the cheesecake filling to cover it completely.
- Step 5: Add optional fresh strawberry slices or drizzle with white chocolate for extra flavor and presentation. Serve immediately to avoid soggy shells.
Tips & Variations
- Brush the inside of the shell with melted white chocolate and let it set to prevent sogginess.
- For a dairy-free version, use vegan cream cheese, coconut whipped topping, vegan cookies, and coconut oil instead of butter.
- Try adding 1/4 teaspoon vanilla extract and a squeeze of lemon juice to the filling for a tangier flavor.
- Experiment with different cookie types in the crunch, such as chocolate wafers or lemon cookies, for new flavor twists.
Storage
Assembled tacos are best eaten within 30 minutes to keep shells crisp. Store cheesecake filling in an airtight container in the refrigerator for up to 2 days and crunch topping at room temperature for up to 3 days. Do not freeze assembled tacos; freeze cheesecake filling separately for up to 1 month, thawing overnight in the fridge.
How to Serve
Serve this delicious recipe with your favorite sides.
FAQs
Can I make these ahead of time for a party?
Yes, prepare each component separately and assemble the tacos 15-20 minutes before serving. A DIY taco bar lets guests customize and maintain crisp shells.
What if I can’t find freeze-dried strawberries?
Use strawberry gelatin powder mixed with crushed vanilla wafers as a substitute. It won’t be as intense but will add sweetness and color.
Print
Strawberry Crunch Cheesecake Tacos Recipe
- Total Time: 10 minutes
- Yield: 1 serving 1x
- Diet: Vegetarian
Description
Strawberry Crunch Cheesecake Tacos are a delightful no-bake dessert that transforms traditional cheesecake into a portable, crunchy, and visually appealing treat. Featuring a crispy waffle cone shell filled with a creamy cheesecake filling and topped with a signature strawberry crunch made from crushed Golden Oreos, freeze-dried strawberries, and melted butter, these tacos deliver a perfect blend of textures and flavors in under 15 minutes.
Ingredients
For the Shell:
- 1 waffle cone or taco-shaped cookie shell
For the Filling:
- 2 oz cream cheese, softened
- 1 tablespoon powdered sugar
- 2 tablespoons whipped topping (or whipped heavy cream)
For the Crunch Topping:
- 6–8 Golden Oreos
- 2 tablespoons freeze-dried strawberries
- 1 tablespoon butter, melted
Optional Toppings:
- Fresh strawberry slices
- White chocolate drizzle
- Extra freeze-dried strawberry pieces
Instructions
- Prepare the Strawberry Crunch Topping: Crush 6-8 Golden Oreos in a food processor or place them in a sealed plastic bag and crush with a rolling pin until coarse crumbs form. Add 2 tablespoons of freeze-dried strawberries, crushed into a powder, and mix with 1 tablespoon of melted butter until the mixture holds together when pressed. Set aside or store in an airtight container for up to 3 days at room temperature.
- Make the Cheesecake Filling: Beat 2 ounces of softened cream cheese with 1 tablespoon of powdered sugar until smooth and fluffy. Gently fold in 2 tablespoons of whipped topping until well combined, ensuring the mixture is thick enough to hold its shape but still creamy. Optional: add 1/4 teaspoon vanilla extract and a squeeze of lemon juice for extra tang.
- Assemble the Tacos: Choose your taco shell (waffle cone, warmed and bent sugar cone, or a taco-shaped cookie shell). Pipe or spoon the cheesecake filling evenly into the shell. Press the strawberry crunch topping generously over the filling to coat it completely. Garnish with fresh strawberry slices, drizzle with melted white chocolate, and sprinkle extra freeze-dried strawberry pieces if desired. Serve immediately to avoid sogginess as filled shells are best enjoyed within 30 minutes.
Notes
- Do not fill shells more than 30 minutes before serving to prevent sogginess.
- The crunch topping can be made up to 3 days ahead and stored at room temperature in an airtight container.
- Cheesecake filling can be prepared up to 2 days ahead and refrigerated.
- For a moisture barrier, brush the inside of the shell with melted white chocolate and let it set before filling.
- Use vegan substitutes to make the recipe dairy-free or vegan.
- Freeze cheesecake filling for up to 1 month; thaw overnight before use. Do not freeze assembled tacos or crunch topping.
- Best served cold and fresh, not reheated.
- Prep Time: 10 minutes
- Cook Time: 0 minutes
- Category: Dessert
- Method: No-Cook
- Cuisine: American
Keywords: cheesecake tacos, cream cheese recipes, freeze-dried strawberries, handheld desserts, no-bake desserts, quick desserts, single serving dessert, strawberry crunch, strawberry dessert, viral dessert recipe, waffle cone desserts


