
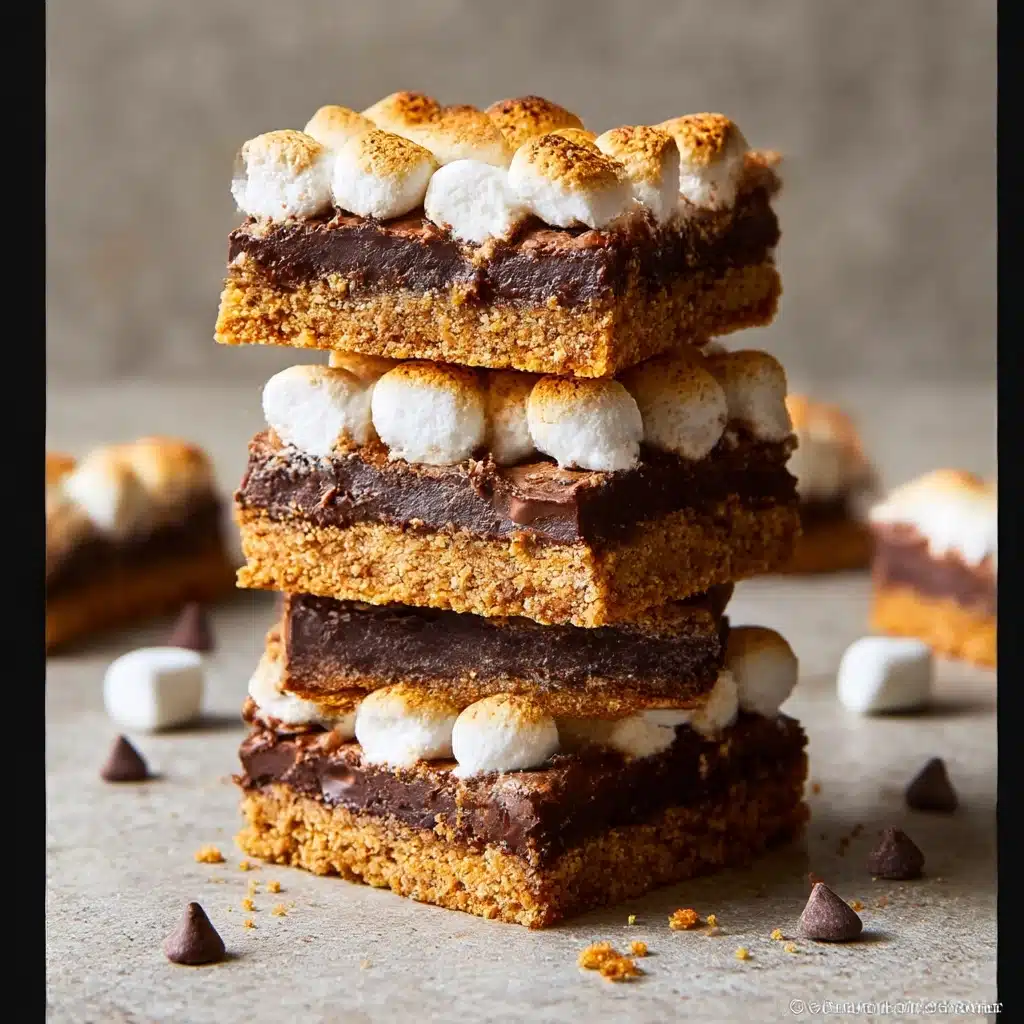
S’more Bars Recipe
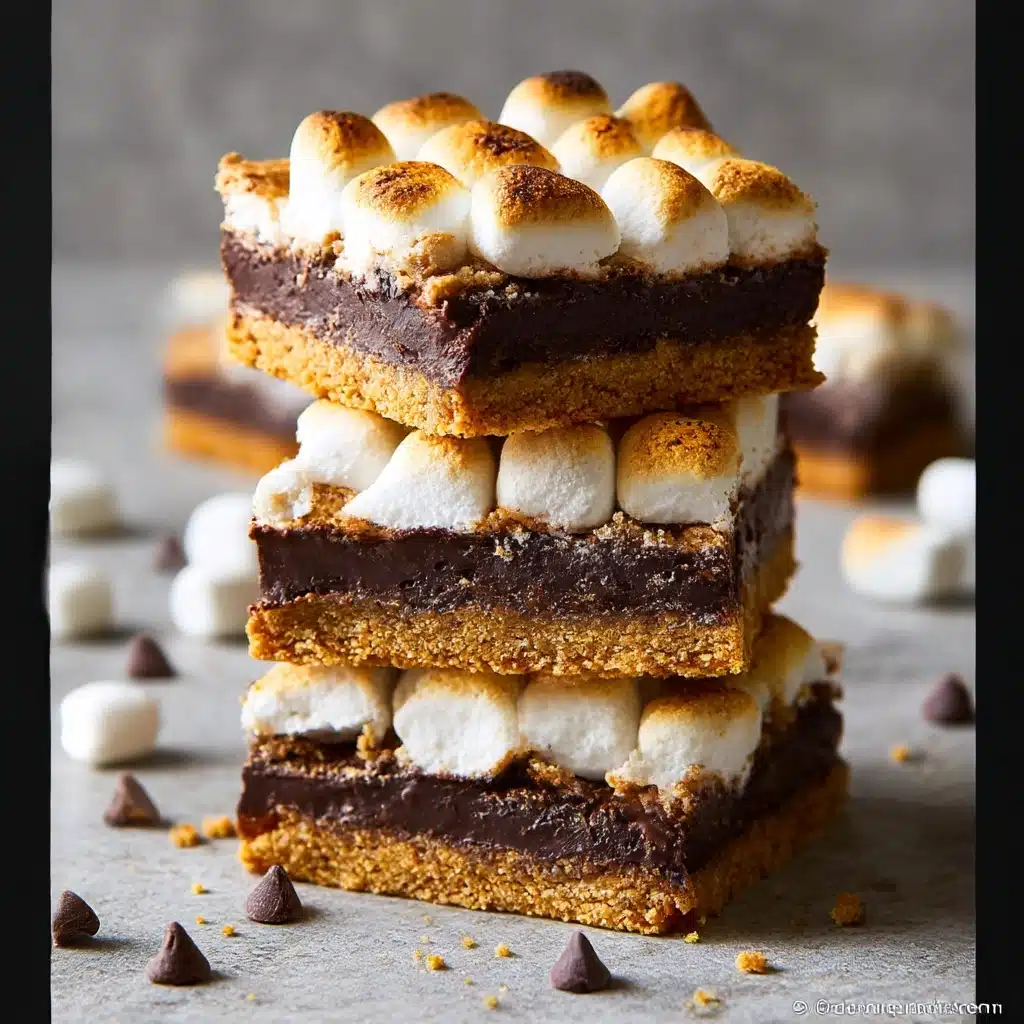
When you think of cozy campfire nights and sweet, melty treats, nothing captures that nostalgia quite like S’more Bars. These delightful bars bring together the irresistible crunch of graham cracker crust, the creamy richness of melted chocolate, and the fluffy sweetness of toasted marshmallows all baked into one heavenly dessert. Whether you’re looking for a fun twist on the classic s’more or an effortlessly shareable treat for your next gathering, these S’more Bars deliver a perfect balance of textures and flavors that everyone will adore.
Ingredients You’ll Need
The magic of S’more Bars lies in their simplicity, and the ingredients are no exception. Each component plays an essential role in crafting the perfect bite: the graham crackers add a buttery crunch, the melted butter keeps everything together with richness, chocolate chips provide gooey decadence, and mini marshmallows bring that signature toasty sweetness and soft texture that makes this dessert truly irresistible.
- 2 cups Graham cracker crumbs: This forms the crunchy, buttery base that mimics the classic s’more crust.
- 1/2 cup Melted butter: Helps bind the graham cracker crumbs while adding rich flavor.
- 4 cups Chocolate chips: Choose your favorite—semisweet or milk chocolate works perfectly for that melty goodness.
- 1 package Mini marshmallows: The crowning glory that toasts golden in the oven and adds soft sweetness.
How to Make S’more Bars
Step 1: Prepare Your Oven and Pan
Start by preheating your oven to 350°F to get it nicely warmed up and ready for baking. While it heats, grease a 9×13-inch pan thoroughly with cooking spray. This step is important to ensure your bars don’t stick and slide out easily after baking.
Step 2: Create the Graham Cracker Crust
In a mixing bowl, combine the graham cracker crumbs and melted butter until the mixture is evenly moistened. The butter acts as the glue that brings the crumbly base together. Then, press this mixture firmly into the bottom and up the sides of your prepared pan, creating an even layer that will hold all that melty chocolate and fluffy marshmallow.
Step 3: Pre-bake the Crust
Bake the crust for 8 minutes in your preheated oven. This short bake helps the crust set and develop a bit of crispiness, making sure your S’more Bars have that satisfying crunch underneath all the gooey toppings.
Step 4: Add Chocolate and Marshmallows
Remove the crust from the oven and evenly sprinkle the chocolate chips over the hot crust. Then top generously with mini marshmallows. These layers will melt and bubble together, creating that perfect blend of creamy chocolate and toasted marshmallow that defines S’more Bars.
Step 5: Final Bake for Toasted Perfection
Return the pan to the oven and bake for 20 minutes, or until the marshmallows turn a gorgeous golden brown on top. Keep a close eye in the last few minutes so they don’t burn—golden and toasted is the goal, as that caramelization adds a delicious smoky sweetness.
Step 6: Cool and Chill
Once baked, set the pan aside to cool to room temperature. Then, for the best cutting experience and cleaner slices, place the bars in the refrigerator until fully chilled. This step lets the bars firm up so they hold together beautifully.
Step 7: Cut and Serve
With a sharp knife, cut into bars of your desired size and serve these charming treats to anyone lucky enough to get a taste. Expect smiles all around!
How to Serve S’more Bars
Garnishes
Feel free to add a little extra flair by sprinkling some crushed graham crackers or a drizzle of melted chocolate on top before serving. A light dusting of powdered sugar or mini marshmallows placed on each bar right before serving can also add a fun visual and taste boost to your S’more Bars.
Side Dishes
S’more Bars pair beautifully with a cold glass of milk or even a cup of rich coffee or hot chocolate for a cozy dessert experience. If you’re serving these at a party, consider fresh fruit or a simple vanilla ice cream scoop to offer a refreshing balance to their sweetness.
Creative Ways to Present
For a whimsical touch, serve your S’more Bars in individual mason jars layered with extra marshmallows or chocolate chips. Another idea is to cut the bars into small bite-sized pieces and serve them on a platter mixed with roasted nuts or dried fruits for a “snack board” feel that will wow your guests.
Make Ahead and Storage
Storing Leftovers
Once cooled and chilled, store your S’more Bars in an airtight container in the refrigerator. They will stay fresh and tasty for up to 4–5 days. Keeping them cold ensures the marshmallows maintain their soft texture and the crust stays firm and delicious.
Freezing
You can freeze S’more Bars by wrapping them individually in plastic wrap and then placing them in a freezer-safe container or bag. Frozen bars keep well for up to 2 months. When you’re ready to enjoy, simply thaw them overnight in the refrigerator.
Reheating
If you like your S’more Bars warm and gooey, reheat them gently in a microwave for 15-20 seconds or in a low oven (around 300°F) for 5-7 minutes. Just be careful not to overheat and burn the marshmallows!
FAQs
Can I use different types of chocolate chips?
Absolutely! Semisweet, milk, dark, or even white chocolate chips can be used based on your preference. Just be mindful that different chocolates melt differently, but all add a wonderful flavor twist to the S’more Bars.
Are mini marshmallows necessary, or can I use regular-sized ones?
Mini marshmallows work best because they melt evenly, creating that familiar toasted layer on top. Regular-sized marshmallows can also be used, but you may need to cut them into smaller pieces or monitor baking time closely to avoid uneven melting.
Can I make the crust gluten-free?
Yes! Simply swap the regular graham cracker crumbs for a gluten-free version. This substitution keeps the same texture and flavor, letting everyone enjoy your delicious S’more Bars without worry.
How do I prevent the marshmallows from burning?
Keep an eye on the bars during the last 5 minutes of baking. If the marshmallows start browning too quickly, you can loosely cover the pan with foil to protect them while the rest finishes baking.
Can these be made vegan?
Yes! Use vegan butter alternatives, dairy-free chocolate chips, and vegan marshmallows to make delicious vegan-friendly S’more Bars that still deliver that nostalgic flavor.
Final Thoughts
If you’ve been craving a dessert that combines childhood memories with adult-level deliciousness, these S’more Bars are just the ticket. With their perfect balance of crunchy crust, rich chocolate, and toasted marshmallow sweetness, they’re sure to become your go-to treat for gatherings, cozy nights, or whenever you need a little sweet comfort. Go ahead and give them a try—you might just find yourself making them again and again!
Print
S’more Bars Recipe
- Total Time: 38 minutes
- Yield: 12 bars 1x
- Diet: Vegetarian
Description
Deliciously gooey and easy-to-make S’more Bars that combine a buttery graham cracker crust with melty chocolate chips and toasted mini marshmallows. Perfect for satisfying your sweet tooth with the classic campfire treat in a convenient bar form.
Ingredients
Crust
- 2 cups graham cracker crumbs
- 1/2 cup melted butter
Topping
- 4 cups chocolate chips
- 1 package mini marshmallows (about 10 oz)
Instructions
- Preheat Oven: Set your oven to 350°F (175°C) to prepare for baking the crust.
- Prepare Pan: Grease a 9×13-inch baking pan thoroughly with cooking spray to prevent sticking.
- Mix Crust: Combine the graham cracker crumbs and melted butter in a bowl until the mixture resembles wet sand.
- Form Crust: Press the crumb mixture firmly along the bottom and up the sides of the prepared pan, creating an even layer.
- Bake Crust: Bake the crust in the preheated oven for 8 minutes to set it slightly.
- Add Toppings: Remove the pan from the oven and evenly sprinkle the chocolate chips over the warm crust, then layer the mini marshmallows on top of the chocolate.
- Bake Again: Return the pan to the oven and bake for 20 minutes, or until the marshmallows are golden brown and toasted.
- Cool and Chill: Allow the bars to cool at room temperature, then refrigerate until firm to make cutting easier.
- Serve: Cut into squares and serve to enjoy this classic and comforting treat.
Notes
- You can substitute dark or milk chocolate chips according to preference.
- Be careful not to overbake the marshmallows to avoid burning.
- For easier cutting, chill the bars in the fridge for at least 30 minutes after baking.
- Store leftover bars in an airtight container in the refrigerator for up to 3 days.
- To add a twist, sprinkle chopped nuts or drizzle with caramel before baking.
- Prep Time: 10 minutes
- Cook Time: 28 minutes
- Category: Dessert
- Method: Baking
- Cuisine: American
Nutrition
- Serving Size: 1 bar (1/12th of recipe)
- Calories: 320 kcal
- Sugar: 27 g
- Sodium: 120 mg
- Fat: 18 g
- Saturated Fat: 11 g
- Unsaturated Fat: 6 g
- Trans Fat: 0.1 g
- Carbohydrates: 38 g
- Fiber: 2 g
- Protein: 3 g
- Cholesterol: 30 mg
Keywords: S’more bars, graham cracker bars, marshmallow bars, chocolate dessert, easy dessert, campfire treat
